Background
Sunday, October 9, 2011
Reclaimed Chalk/Corkboard
Here is another one of my fun finds. I came across this chalk/corkboard that needed a little TLC, so I removed the cheap hardware, sanded it down, painted it, and had fun using the mixed media technique using paper, inks, paints, and metal embellishments. I used chalk paint on a piece of metal and glued it over the old chalkboard, added a new piece of corkboard to the corkboard side and made magnets and push pins out of bottlecaps. It has a tray to hold chalk, pens, and extra magnets and/or push pins and would be a fun and practical piece for any wall of the house. It is on sale for $49. Just send me an email at: judesigns@hotmail.com if you have any questions or would like to purchase this piece.
Book Clocks
I think I have mentioned this before, but I really like clocks. I especially like re-purposing items and turning them into clocks. Here is a project I have been wanting to make for awhile and I finally finished my first one. It is a "Book Clock". I found an old book and distressed it, because I just didn't think it was distressed enough, added a clock mechanism to the inside, and cut a square into the pages of the book so that the mechanism doesn't show. I then added a favorite saying of mine from Alfred Binet "Don't count every hour in the day. Make every hour in the day count."
This would make a great decorative piece for any shelf, end table, or coffee table. It measures 5 1/2"W x 7 1/2"H and is about 1 1/2" thick. This one is for sale for $25. Please email me at judesigns@hotmail.com with any questions or if you would like to purchase this clock, or have me custom make one for you.
Here is another I made with a saying from Pericles "Time is the wisest counselor of all."
Saturday, October 1, 2011
Old Wood Ladder = Shelving Unit
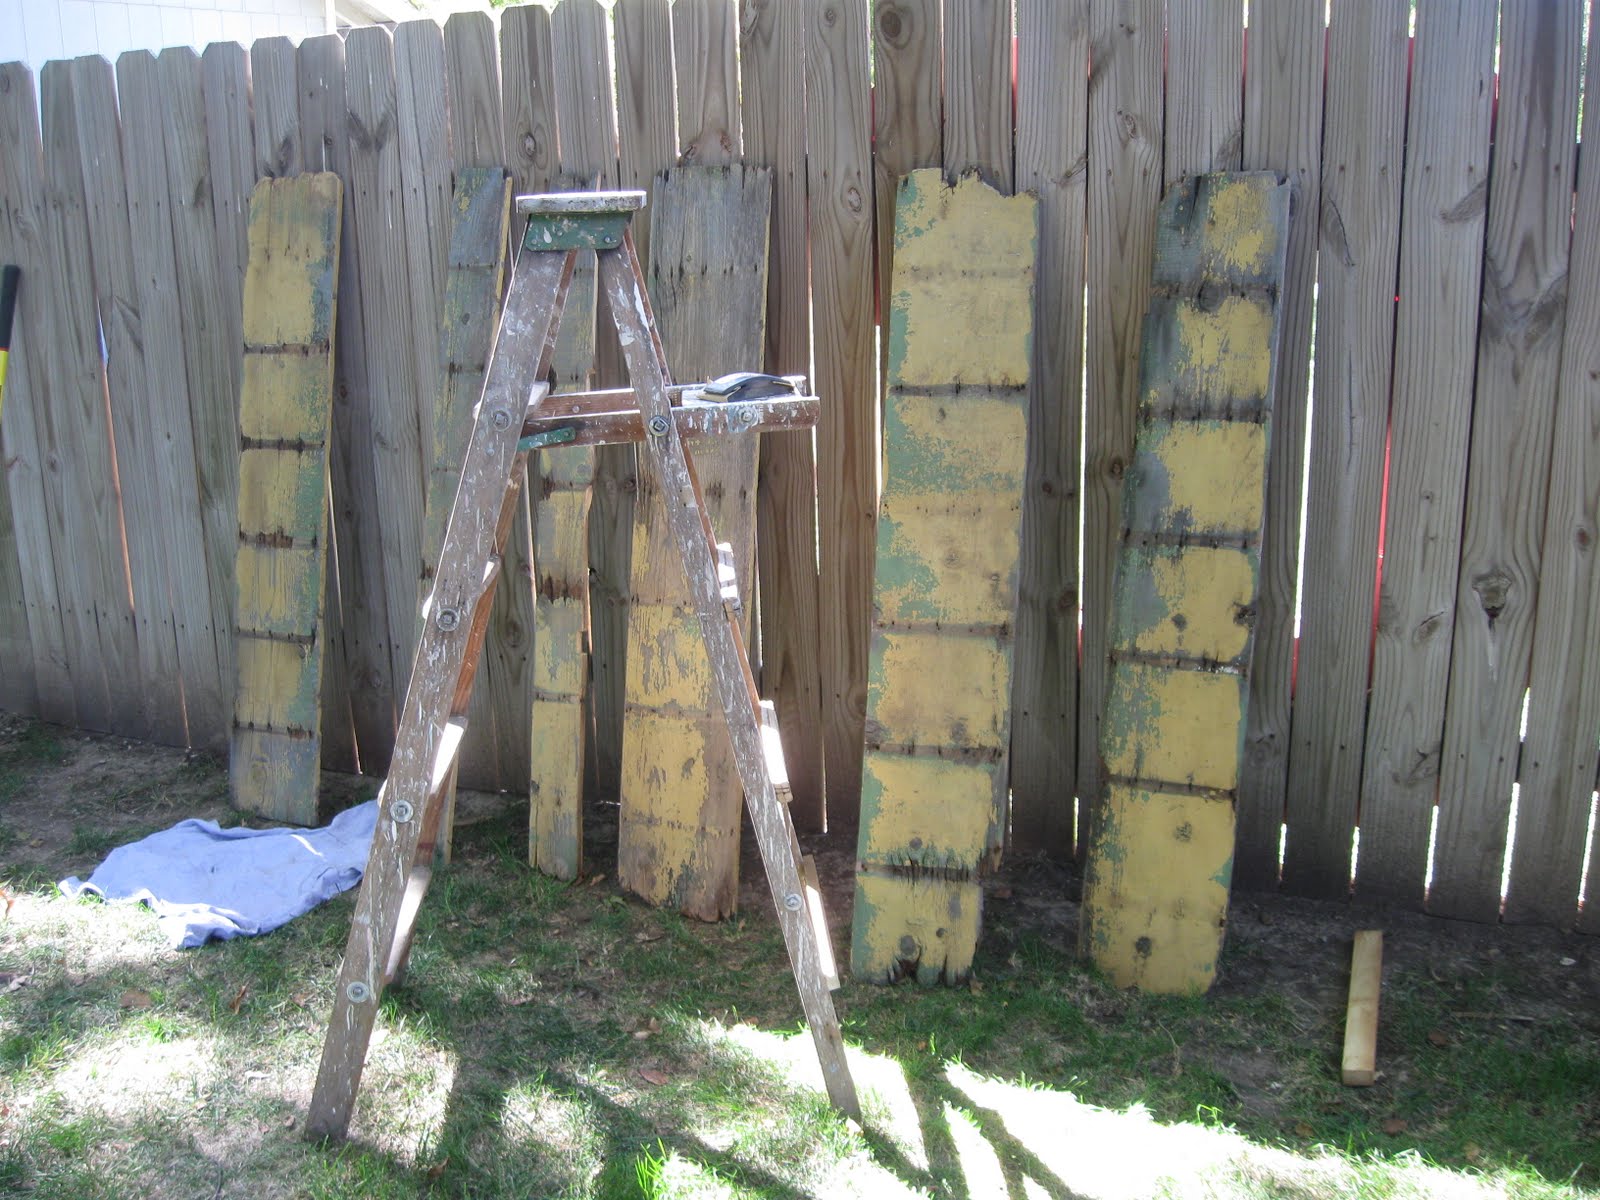
I have been in need of a shelving unit for my studio to display art work and I wanted something rustic. A while back I had seen an idea where someone turned an old wood ladder into shelves and I decided that idea was perfect for me. The tricky part was finding an old wood ladder and wood in good enough condition to use. I was soooo excited when I came across all of these items yesterday and even more excited that it only cost me $3! So with a little bit of nail pulling, sanding, painting, cutting, and screwing boards together, I now have shelves!!
Here is what the ladder and boards looked like before sanding and painting them.
Here is what the ladder looked like when I got done slapping paint on it. I used some old left over paint that I had and didn't want to cover the ladder completely, so I brushed it on sparingly.
Here is what the boards looked like before and after I painted them.
Here is my finished shelving unit!
This is what it looks like in my studio space. Isn't it perfect?! Now to start filling the shelves.
Here is what the ladder and boards looked like before sanding and painting them.
Here is what the ladder looked like when I got done slapping paint on it. I used some old left over paint that I had and didn't want to cover the ladder completely, so I brushed it on sparingly.
Here is what the boards looked like before and after I painted them.
Here is my finished shelving unit!
This is what it looks like in my studio space. Isn't it perfect?! Now to start filling the shelves.
October Newsletter
Here is some information on what all is going on this month. I will be having a workshop on Saturday, Oct. 15th from 2pm-6pm and will be providing you with space and tools so you can work on your own projects or I will also have kits available for you to purchase and work on.
If you would like to attend this workshop, please RSVP with me by Thurs., Oct. 13th.
Tuesday, September 20, 2011
Distressed/Crackled Framed Art Piece
Ok, so you know how I told you in an earlier post that I have really been having fun reclaiming? Well, here is a frame that I picked up to reclaim. Isn't it purdy? Not really, whatever was used on the glass to make it look like stain glass was flaking off, but I really liked the size.
Here are a couple of photos of the completed project. The size of this frame is: 11.5"W x 23.5"H and is painted black, distressed, and crackled. It is hard to see in the photos, but I used paper that looks like old letters and layered them to create the background. The saying is by Claude Bissell "Risk more than others think is safe. Care more than other think is wise. Dream more than others think is practical. Expect more than others think is possible." and is on Kraft color paper. I also added fabric flowers in the bottom right hand corner. The price of this art piece is: $59. You can see it in person along with my other completed and in progress art pieces every Thursday from 4pm-7pm and on the 2nd Saturday of the month from 10am-3pm at Studio B, 115 N. Santa Fe, Salina, KS or you can make an appointment by emailing me.
Keep checking back as I have more projects soon to be completed. Here are a couple of other finds that I am working on and will post completed pictures soon!
Saturday, September 10, 2011
September Newsletter
Here is my September Newsletter! There is a lot of fun savings and classes listed, so be sure to click on it and check it out!!
Saturday, September 3, 2011
Reclamation!
Lately I have enjoyed shopping at our local DAV and finding all sorts of items to bring home and turn into my reclaiming projects! Here are some photos of items I found and have reclaimed recently. Keep checking back as I will post more as I complete them. Would you like for me to post tutorials? Let me know by commenting below or sending an email to judesigns@hotmail.com, if you would like for me to post step by step instructions with pictures on what I did and how YOU can do this too! :)
I just recently moved into a working art gallery called, Studio B, and was needing some furniture to help store and display my art work, so here were a couple of things I found at our local DAV that have come in very handy.
This first one is a large metal plate that I fell in love with the minute I saw it. My husband doesn't like the color and offered to paint it for me, but I really like it just the way it is! As I was setting up at my new studio one evening I noticed that there weren't any clocks (and I LOVE clocks), so I decided to turn this plate into a clock and hang it in my studio space. Here are some before and after photos:
This next find was very exciting for me. A small, 7 drawer desk that is the perfect size for my studio space! It wasn't in too bad of shape, was all wood, and the best part is it was only $8!! It is still a work in progress as I have some distressing and vinyl to add to it, but I have already started using it and thought I would show you what it looks like as of now. Here are some before photos (sorry for the blurry photo. I took it with my phone and didn't realize that it was that blurry):
Here are some photos of what it looks like now. I just love the color! And the screen door you see behind it is another find that I got for free! Cleaned it up, found a small sample of green paint for $1 at Lowe's, and painted it. It has come in handy to hang my plaques from!
Since you can see both sides of the desk, in my studio space, I decided to utilize the back of the desk by adding metal to both sides (this photo only shows it on one side), so I will have a place to display the magnets I make. I will be finishing this off by adding vinyl.
Here is a photo of how the clock, desk, and door look in my studio space. Now to find a couple of wood shelving units. If I don't find some soon, I may just make my own. :)
I just recently moved into a working art gallery called, Studio B, and was needing some furniture to help store and display my art work, so here were a couple of things I found at our local DAV that have come in very handy.
This first one is a large metal plate that I fell in love with the minute I saw it. My husband doesn't like the color and offered to paint it for me, but I really like it just the way it is! As I was setting up at my new studio one evening I noticed that there weren't any clocks (and I LOVE clocks), so I decided to turn this plate into a clock and hang it in my studio space. Here are some before and after photos:
This next find was very exciting for me. A small, 7 drawer desk that is the perfect size for my studio space! It wasn't in too bad of shape, was all wood, and the best part is it was only $8!! It is still a work in progress as I have some distressing and vinyl to add to it, but I have already started using it and thought I would show you what it looks like as of now. Here are some before photos (sorry for the blurry photo. I took it with my phone and didn't realize that it was that blurry):
Here are some photos of what it looks like now. I just love the color! And the screen door you see behind it is another find that I got for free! Cleaned it up, found a small sample of green paint for $1 at Lowe's, and painted it. It has come in handy to hang my plaques from!
Since you can see both sides of the desk, in my studio space, I decided to utilize the back of the desk by adding metal to both sides (this photo only shows it on one side), so I will have a place to display the magnets I make. I will be finishing this off by adding vinyl.
Here is a photo of how the clock, desk, and door look in my studio space. Now to find a couple of wood shelving units. If I don't find some soon, I may just make my own. :)
Subscribe to:
Posts (Atom)