Background

Monday, June 10, 2013

Bench-Around-a-Tree


Last summer we added a small stone patio area around our chiminea in one of the corners of our backyard.  We have really started enjoying and using this corner more and I have been looking for ways to make it look nicer as well as add more seating. We have two large trees in our backyard (creating a lot of shade) and clay type soil, so it makes it pretty difficult for dressing up the bottom of the trees with plants.

I was excited to come across some instructions for a tree bench, on This Old House.  The perfect solution for what we were needing (ok, maybe "wanting" is more truthful).  Since the weather was soooo nice this past weekend, I was able to talk my family into helping me accomplish this project!  Even though the house is a wreck, due to remodel and repair projects going on inside (you can check out or small bathroom remodel here), I just couldn't pass up spending time outside with the family and what better way to do that than working on a project together?! (although my family would beg to differ)  Projects like this definitely builds patience and character. :)

Here is a "Before" photo of the bottom of our large oak tree.

Here is my family hard at work.  
Yes, my daughter is playing with a bug and my son is walking the planks. :)

We borrowed a miter saw from a friend and I loved using it!  My daughter also insisted on trying it.
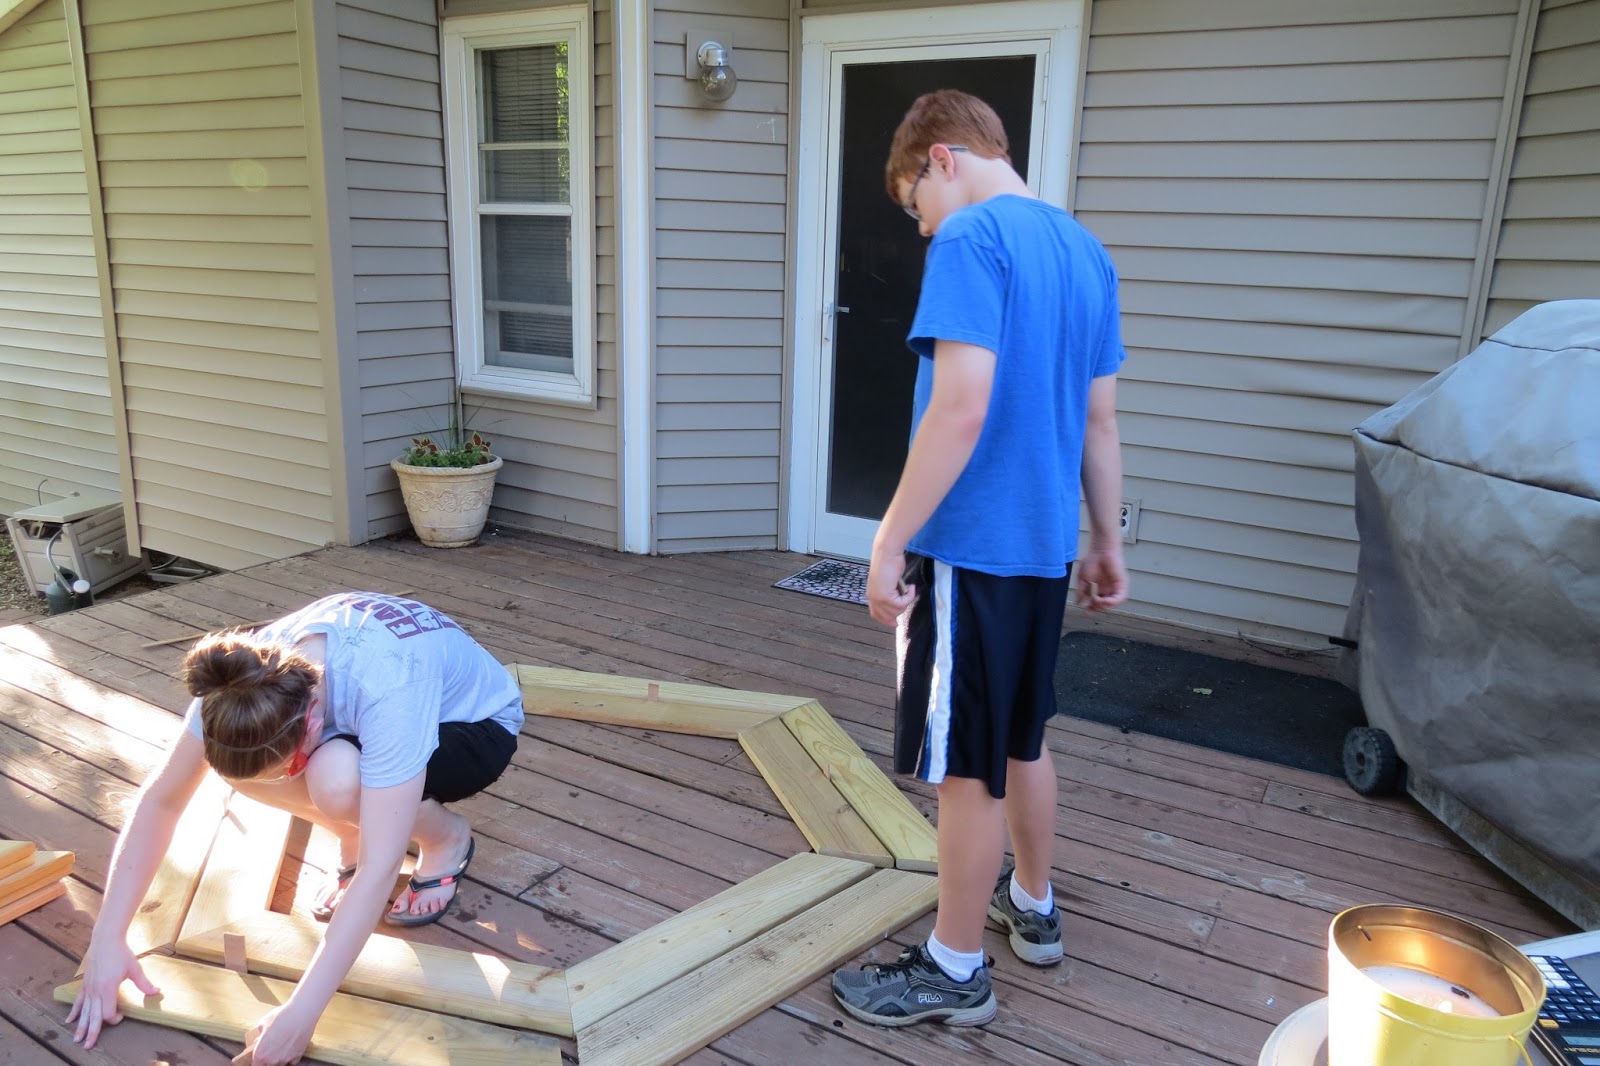
Here is my daughter laying out all of the boards, to make sure things are fitting together, 
while my son supervises.

Here it is all cut and they all fit together nicely, at least at this point. :)

Here we are working on putting the legs of the bench together.

The legs are done and we spaced them around the tree to make sure we were able to avoid roots.
If I would have been paying closer attention, I could have flipped this one leg around, to
make a capital "F" for family project.

This part was the most time consuming and frustrating part, getting everything to line up!  
We got it pretty close, screwed together two sections, carried it out to the tree and then 
finished putting it together.

Once we got it around the tree and positioned it to miss all of the roots, there was one side 
that is a little whopperjawed, so there was more measuring and cutting that needed done, but
we got it figured out.  Now I just need to stain/treat it and it will be ready to use!  I have a lot
of limestone that I am thinking about putting around the bottom of the bench and for color plan 
on adding planters with flowers in a couple of areas on top of the bench.
If we can do it, you can too!


Thursday, May 30, 2013

Small Bathroom Renovation

There always seem to be repairs and upkeep, especially when you own an older home.  Over the past several years, my hubby and I have decided to prioritize our list and tackle one room or area of the house at a time, so we don't become overwhelmed financially, emotionally, or physically, .

This year, we decided to do some repairs and updating to our bathrooms.  This week we started tackling our small bathroom located in the front of the house, which is mainly used by our kiddos. We had done some updating to it about 5 years ago, so there isn't a whole lot that needs done, mainly repairing some damaged walls and updating the shower walls.  Below are photos of the progress. 


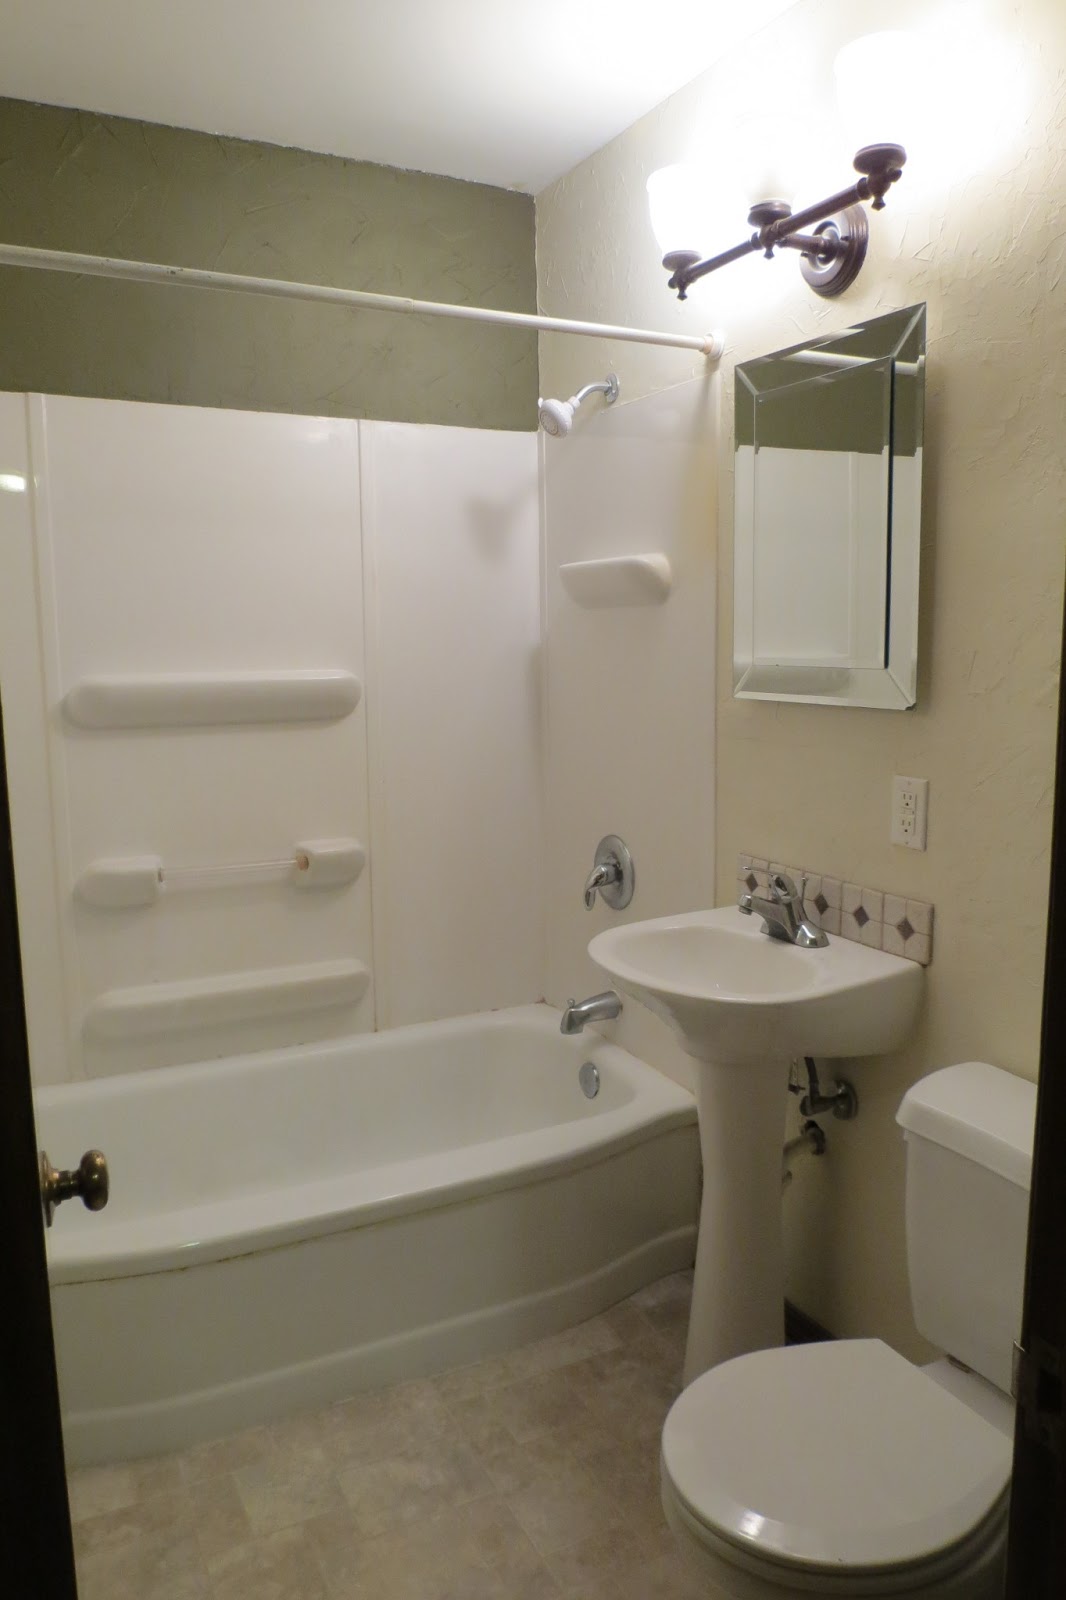
Above are photos of what the bathroom looked like before we started tearing it up.
Doesn't look too bad from a distance, but up close you can see the
damaged walls and the yucky cheap shower walls.


First Day:
 Excited to start repairing this bathroom! Shower piping capped, sink and toilet removed.  

Now time for the ugly cheap shower walls to come down!

 Demolition, my hubby and I can do.  Installation we leave to the professionals. :) 

Look what we found inside the wall, below the medicine cabinet.  Yes, hundreds of old razor blades.  Always interesting what you find when doing renovations. :)

Whew, a good first day!  All walls tore out, with only a few minor injuries.

Days following...
Plumbing for the shower head was raised, cement board installed around tub,
Sheetrock put up and walls muddied.  


Once the mud was dry, we sanded and primed the walls and ceiling.

Excited to get the walls painted, so we could re-install the light fixture.
It helps to see what you are doing. :)


The tile is finally getting installed and boy does it look sharp!

Almost done!  There are a few finishing touches (trim & painting), but it is usable again and it was so nice outside, that we decided to take advantage of it and built a bench around one of our backyard trees this weekend.  You can check it out here.


Tuesday, April 30, 2013

Paint Organizer for My Craft Area


I love to create, but I also love organization, so I am always looking for easy and inexpensive ways to keep things organized.  I have a little corner in our basement that is my "Craft Area" and since it isn't very big I continue to look for ways to keep it organized, so I have more space to create.  

Lately my paints had started taking over my work area, so I began looking for a solution.  

 I was thrilled when I came across this wonderful wood spice rack at a thrift store for less than $3!

 I applied some colorful spray paint and voila, it now helps keep my paints organized and off my work area!

 It is large enough to hold all of my paints and glues and even has space for more.


Wednesday, April 17, 2013

Springy Door Decor


Here is a quick post to show you my new inexpensive Springy door decor!  I across a couple of plastic oval frames at a thrift store awhile back and knew they would be perfect for something and they were!  I forgot to get a picture of what they looked like before I painted them, but they were a yucky gold color.


I got out the spray paint and started painting with some fun Springy colors!  Then I tore some cream colored fabric and tied the frames together. I was also able to find some pretty flower sprays at the Dollar Tree, which added the extra color I was needing. I really like how fun and different it turned out.  I am thinking of adding a chalkboard to one of the frames, so I can leave neat messages to our guests, postman, UPS man, etc.  Think that would brighten their day?


Cost:  Since I already had the spray paint and the fabric, this project only cost me around $5! 

**After my first post I decide to add a magnetic chalkboard to the blue oval frame and really like being able to leave messages on it!  The very first photo shows you what it looks like now.


Tuesday, April 2, 2013

Kitchen Series - Memo Boards


Another thing I find helpful to have in my kitchen area are memo boards.  I enjoy writing notes of encouragement and messages to my family, as well as displaying photos.  There are so many fun, creative, and inexpensive ways to make memo boards, so I thought I would share a few.  Check out more ideas and photos on my facebook page at: Dippity Dot Creations.

The photo above shows a small wall located in my kitchen/dining room area, in which I enjoy displaying collectibles, photos, and messages.  I came across some silver platters at a local thrift store and brought them home to turn them into memo boards.  The two platters hanging on the wall I used ribbon and hot glue to connect them together and hang them.  I then cut and attached decorative paper to fit inside each of them and made coordinating magnets, so I can easily display photos and notes.  The round platter hanging below the shelves, I used chalkboard paint on the inside and used ribbon to hang it.


This photo shows another platter that I picked up at a thrift store.  It is a nice large platter and was already painted black, so I just added some chalkboard paint in an area on the inside to write messages and added a vinyl saying and chef.


The photos above and below are a couple of memo boards I just recently completed and have for sale.  To check out all of the items available for sale visit my facebook page at: Dippity Dot Creations.

The memo board above is made from a metal platter in a shabby chic design.  The inside is a chalkboard and comes with to magnet fabric flowers.

The photos below are of a painted cutting board that I upcycled into a memo board.  I repainted it, added chalkboard paint to the front, distressed, and added torn fabric to hold the chalk and to hang it.  There are many other fun ways to turn items into memo boards.  Feel free to share any photos of ones you have made or like!  


Friday, March 29, 2013

String Art Cross


Before posting more on my Kitchen Series, I thought I would share a project that I had my son's 6th grade class make, during their Easter Party this week.  I chose a stringed art project in which they made a cross out of nails and used colorful string for the design.

Here is how we did it:
I needed 15 wood pieces, so I used this very large piece of  old wood and cut pieces that were approximately  5" x 7".

I then created a template on my computer, so the kiddos would know where to place the nails.

Once the nails were in, then the fun part of using string to create a fun design.  We tied a knot on one of the nails and then wrapped it around the whole cross design.  Once that was done then you can go back and make any kind of design you want.  Some of the kids felt adventurous and used two different colors.  

Once they were happy with the result, we tied the string off and they were ready for the final step. 

The final step was to glue on the "Loved, Redeemed, Renewed" banner.  I also came across a neat saying that used these words and they glued it to the back.  It is my hope that they will use it as a daily reminder.

Here is my son hard at work getting his banner cut out, so he can glue it onto his project.


I was a little nervous about the kids using hammers and nails, but they did a great job and seemed to enjoy making this project.  Defiantly an easy, cheap and meaningful project for kids to make! 


Sunday, March 24, 2013

Kitchen Series - Weekly Menu Boards

During the month of March I have been posting great tools and items for the Kitchen on my facebook page, Dippity Dot Creations, and wanted to share them here as well.

One item/tool my family and I use on a daily basis is a Menu Board. We discovered a few years ago that by making a two week menu and shopping only twice a month for the items needed to make these meals that we were saving time and money. There are a variety of ways to post and display your weekly menu, from ones you can hang or use on your fridge if you have a kitchen with minimal counter space to ones that can set on your counter.

Below are a few ways in which I have upcycled items and turned them into Menu Boards.  Enjoy!  Feel free to email me at: judesigns@hotmail.com with questions or to place an order.  Also be sure to stop by my facebook page at: Dippity Dot Creations to see other ideas and items available for sale.


The Menu Board above was made from an upcycled metal book stand.  I spray painted it black, then painted the front with chalkboard paint, used vinyl for the "Menu" and days of the week, and finished it off with a distressed look.  I think this is great, because even for those of you who do not like using chalk, paper strips can be made and magnets used to attach them to this Weekly Menu Board.

This next Menu Board is a dry erase style.  I used a picture frame with easel and added designer paper to the inside.  I cut the word "Menu" and the letters for the days of the week out of brown paper and attached them to the designer paper inside the frame.  The glass on the frame serves as a dry erase board, making it easy to display and change your weekly menu.

For those kitchens that do not have a lot of counter space, a large magnet, like the one in the photo above, works great.  I use one like this in my kitchen and love it.  I digitally designed it and then ordered it on a magnet from Vista Print.  The material used works great to use as a dry erase Menu Board. 

I know that there are many other great ideas out there, so if you have one you would like to share, I would love to see it!